How to Fix Common Highlighter Mistakes: Blending, Placement, and Removal Tips September 1, 2025
Highlighter can lift the face, add healthy radiance, and make features pop in photos. It can also emphasize pores, create metallic stripes, or look oily rather than luminous if the shade, placement, or blending is off. This guide explains how to diagnose the most common highlighter mistakes and fix them on the spot, with practical steps for real-life conditions like strong indoor air-conditioning and fast climate shifts in Dubai and across the United Arab Emirates UAE. You will also find a rescue routine for quick removal without wrecking your base, plus a checklist of tools that keep glow believable all day.
Start With Placement: Where Highlight Belongs
- High points only: Focus on the tops of the cheekbones, brow bone, bridge if it is straight, and the inner corner of the eyes. Avoid the center of the forehead and the tip of the nose if you are naturally oily there.
- Face shape cues: Round faces benefit from a longer, diagonal sweep on the upper cheekbone; square faces suit a shorter, focused pop just above the apple; heart shapes look lifted with a C-shape that arches from brow bone to cheekbone.
- Texture awareness: If enlarged pores or fine lines are present, shift highlight slightly upward and outward to smoother skin so the light catches the glassy area, not the texture.
Blending Basics That Prevent Streaks
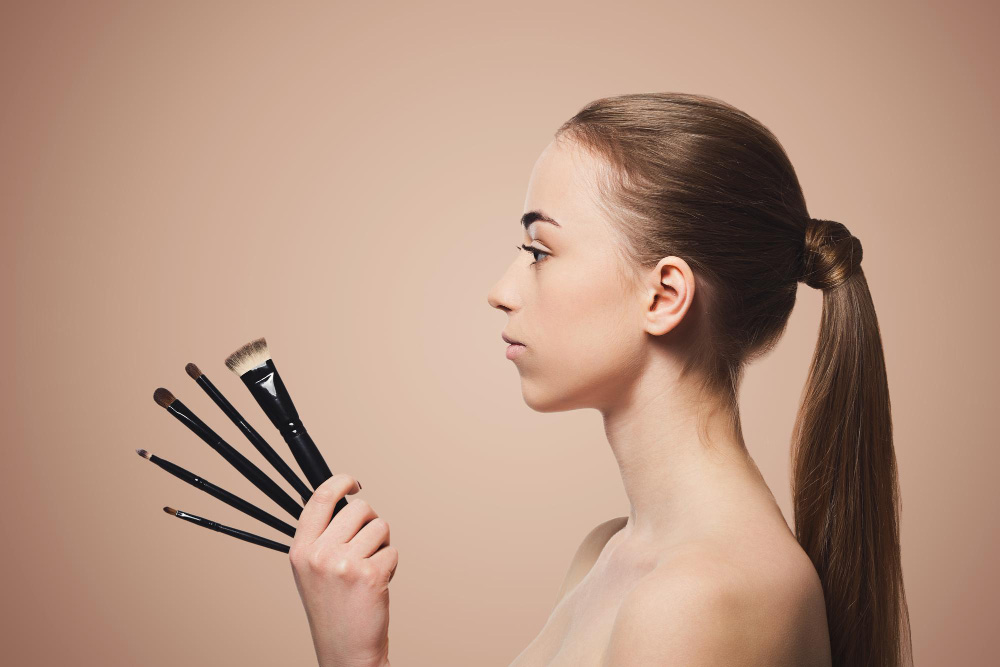
- Choose the right tool: Use a small tapered highlighter brush for powder formulas from sets like Expert Makeup Brushes or Sparkle Brushes Collection. For creams and liquids, a Premium Beauty Sponge pressed and rolled gives a seamless melt.
- Pick up less than you think: Tap the brush once, then tap off excess. With liquids, dot a rice-grain amount and spread before blending.
- Feather the edges: After placing the highlight, switch to a clean, medium-fluffy brush to diffuse the perimeter with tiny circular motions. Keep a Dry Brush Cleaner nearby for instant color switching.
- Sequence matters: For powder highlight, lightly set your base first where the highlight will sit. A whisper of translucent powder prevents patchiness and helps powder glide.
Fix-It Guide For Specific Mistakes
Metallic Stripe On The Cheekbone
- Soften first: Press a clean Premium Beauty Sponge over the stripe to pick up extra pigment.
- Micro-diffuse: Buff the edge with a clean, fluffy brush using minimal pressure.
- Rebalance: If the stripe still looks harsh, veil with a touch of setting powder over the border, not the entire area.
Highlight Emphasizes Pores And Texture
- Slide the placement: Move the highlight a fingertip higher toward the orbital bone where skin is smoother.
- Change the finish: Swap chunky shimmer for a satin-sheen powder like Flower Highlighter, which scatters light more finely.
- Prep smart: Pat a thin layer of blurring primer or finely milled setting powder first, then apply highlighter sparingly.
Wrong Undertone Or Shade
- Match undertone: Golden and olive complexions prefer warm champagne. Cool or rosy skin suits pearl or soft pink. Neutral skin can wear beige-champagne.
- Daylight check: Step near a window or doorway to confirm the color, important when moving between indoor AC and outdoor sun in Dubai and the United Arab Emirates UAE.
- Fast correction: If the shade is too icy or too gold, mix a tiny amount of your setting powder with the highlight on the brush to mute it.
Over-Glazed Nose Or Forehead
- Blot, then blend: Press a tissue or oil-blotting sheet first, then soften with a clean brush.
- Limit the zone: Apply only to the bridge’s highest flat area, skipping the bulb of the nose. On the forehead, keep it to the upper outer corners near the hairline rather than the center.
Patchy Or Lifting Foundation Underneath
- Timing: Let creams set for a minute. Lightly set with powder where the highlighter will sit, then apply powder highlight.
- Motion: Use tapping, not swiping, especially with liquids and creams, to avoid moving the base.
Flashback Or White Cast In Photos
- Refine particles: Extremely reflective mica near the eyes can flash white. Switch to a finely milled formula and avoid stacking layers.
- Camera test: Take a quick photo with and without flash to see the effect before heading out.
Removal And Rescue Without Ruining Makeup
- Tissue lift: Fold a tissue and press over the area to pull away surface shimmer.
- Sponge erase: Use the clean side of a slightly damp Premium Beauty Sponge to bounce and lift pigment. If needed, bounce a touch of your foundation or tinted moisturizer through the same area to re-calm the skin tone.
- Powder blur: Finish by dusting a minimal amount of translucent powder at the border to re-diffuse.
- Glitter fallout: For stubborn particles on the cheeks or jawline, lightly tap with a piece of clean tape, then re-buff the area.
- Clothing or hijab safety: Shield fabric with a tissue while applying. If transfer happens, tap powder onto the spot to absorb oils and brush away gently. For chiffon or cotton, avoid rubbing; let the area dry, then flick away particles.
Climate And Lighting Considerations
Highlighter reads differently under bright sun, office fluorescents, and warm restaurant lighting. In hot-weather commutes and strong indoor AC common in Dubai and the United Arab Emirates UAE, oil can rise while skin surface dehydrates, making highlight look patchy. Counter this by hydrating skin earlier in the routine, blotting before touch-ups, and applying highlight only after the complexion reads balanced again. When moving between outdoor heat and chilled interiors, keep touch-ups targeted rather than re-highlighting the entire area.
A Quick, Reliable Highlight Routine
- Prep with skincare and let moisturizer set fully.
- Apply base and lightly set zones that crease first.
- Choose a shade that matches your undertone and the day’s lighting.
- Place a small amount of highlight on high points only.
- Feather edges with a clean brush, then press a Premium Beauty Sponge to fuse products.
- Photograph under natural light to confirm the blend before leaving.
Build A Smart Glow Kit
- Flower Highlighter or your preferred satin-sheen powder
- Expert Makeup Brushes small tapered highlighter brush
- Sparkle Brushes Collection for detail work
- Premium Beauty Sponge for melting edges and quick removal
- Dry Brush Cleaner for instant shade switching
- Brush box for clean, protected storage
- All-In Bag to carry blot sheets and a mini powder for on-the-go fixes
FAQs
How do I stop highlighter from emphasizing pores?
Shift placement slightly higher, use a satin finish, and set the area first with a trace of translucent powder so the highlight glides instead of catching.
What is the best brush for powder highlighter?
A small tapered brush that is soft and moderately fluffy. It places a precise beam but diffuses the edge for a skinlike result.
Can highlighter work on oily skin?
Yes. Blot first, apply a small amount only to strategic points, and avoid highlighting the oiliest areas like the nose tip and center forehead.
How do I fix too much highlighter fast?
Press a tissue, bounce with a clean damp sponge, then veil the border with a whisper of translucent powder.
Used thoughtfully, highlighter becomes a subtle spotlight that flatters rather than distracts. Whether your day includes outdoor errands, office meetings, or evening plans in Dubai or anywhere in the United Arab Emirates UAE, these placement, blending, and removal strategies keep glow refined from morning to night.
Disclaimer: The guidance above is cosmetic education only and not medical advice. Discontinue use and consult a qualified professional if you experience irritation, redness, or persistent breakouts. Keep cosmetics and tools out of reach of children.